
Designing Molds for INJEKTO 2.0: Tips and Techniques
How can you design molds for INJEKTO 2.0?
Designing molds for INJEKTO 2.0 can seem like a complex task, but with the right tips and techniques, it can be made simple. Whether you are using 3D printed molds or CNC mill molds, here are some guidelines to help you create effective molds for your INJEKTO 2.0 projects.
1. Understand the Requirements
Before you start designing the molds, it is crucial to have a clear understanding of the requirements for your INJEKTO 2.0 project. Analyze the specifications, dimensions, and materials needed for the final product. This will ensure that your molds are designed to meet the desired outcome.
2. Consider the Parting Line
The parting line is the line where the two halves of the mold separate. When designing your molds, pay close attention to the parting line to ensure that it allows for easy removal of the final product. A well-placed parting line will minimize the need for additional finishing work.
3. Optimize Wall Thickness
When designing molds, it is important to optimize the wall thickness of the mold cavity. This will ensure proper filling and cooling of the material during the injection process. Avoid thick sections that can lead to uneven cooling and potential defects in the final product.
4. Incorporate Draft Angles
Draft angles are essential for easy ejection of the final product from the mold. By adding draft angles to the design, you can prevent the product from getting stuck in the mold. Aim for a draft angle of at least 1-2 degrees to facilitate smooth ejection.
5. Use Fillets and Radii
Sharp corners and edges in the mold design can result in stress concentration and potential part failure. To avoid this, incorporate fillets and radii in your mold design. These rounded features distribute stress more evenly, improving the overall strength and durability of the final product.
6. Consider Material Shrinkage
Keep in mind that different materials have varying shrinkage rates during the cooling process. Account for this shrinkage when designing the mold to ensure the final product meets the desired dimensions. Consult material-specific shrinkage charts or guidelines for accurate mold design.
7. Test and Iterate
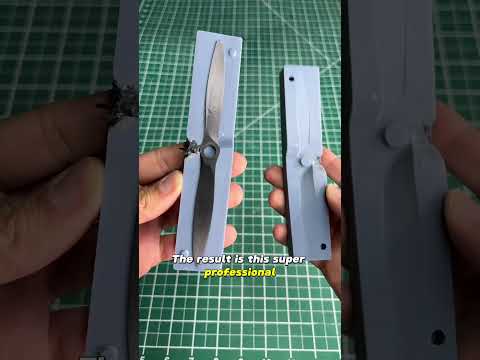
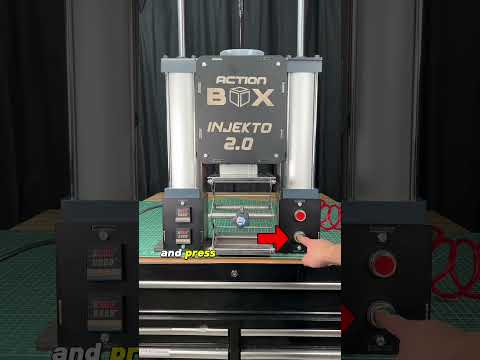
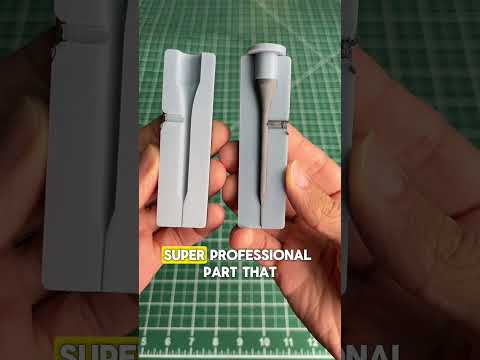
Once you have designed your molds, it is essential to test them. Luckily, this is very simple with the INJEKTO 2.0 desktop plastic injection machine. Conduct small-scale trials to identify any design flaws or areas for improvement. Iterate on your design based on the test results to optimize the mold for better performance.
Conclusion
Designing molds for INJEKTO 2.0 can be a straightforward process if you follow these tips and techniques. By understanding the requirements, considering the parting line, optimizing wall thickness, incorporating draft angles, using fillets and radii, accounting for material shrinkage, and testing your designs, you can create molds that produce high-quality, accurate, and durable products with INJEKTO 2.0.